
개요
서버를 만드는 일은 쉬운일이 아니다. 이 서버를 대신 만들어 놓고 데이터 생성, 조회, 삭제/수정 등 기능을 제공해주는 서비스들이 있다. 이를 서버리스 라고 부른다!
서버에서 주는 데이터 형식은 JSON으로 되어 있다.
앱 화면에서 전달받은 데이터를 준비하는 시점은 앱 화면이 그려진 다음에 서버측에서 제공해주는 API를 이용해 필요한 데이터를 준비한다. 👉 useEffect
날씨 API
날씨데이터를 제공해주는 openweathermap api를 사용해보자.
API를 통해 날씨 데이터를 가져올 때 필요한 것
- 현재 위치(좌표) 데이터
- 위치 데이터를 이용해 현재 위치 날씨 데이터 가져오기
앱 위치 정보 권한 설정 (expo-location)
Expo에서 현재 위치 데이터를 얻게 해주는 도구를 제공한다.
설치
expo install expo-location
// MainPage.js
import React, {useState, useEffect} from "react";
import {
    StyleSheet,
    Text,
    View,
    Image,
    TouchableOpacity,
    ScrollView,
    SafeAreaView,
    Alert,
} from "react-native";
import { StatusBar } from "expo-status-bar";
import * as Location from 'expo-location';
import data from "../data.json";
import Card from "../components/Card";
import Loading from "../components/Loading";

const mainImg =
    "https://storage.googleapis.com/sparta-image.appspot.com/lecture/main.png";
const cardImg =
    "https://firebasestorage.googleapis.com/v0/b/sparta-image.appspot.com/o/lecture%2Fpizza.png?alt=media&token=1a099927-d818-45d4-b48a-7906fd0d2ad3";

// 페이지 이동을 구현
// Stack.Screen 으로부터 MainPage 는 navigation과 route 를 인자로 전달받는다.
export default function MainPage({navigation, route}) {
    const [state, setState] = useState([]);
    const [ready, setReady] = useState(true);
    const [cateState, setCateState] = useState([]);

    useEffect(() => {
        // 헤더의 타이틀 변경
        navigation.setOptions({
            title: '나만의 꿀팁'
        })

        setTimeout(()=>{
            getLocation()
            setState(data.tip)
            setCateState(data.tip)
            setReady(false)
        }, 1000)
    }, [])

    const category = (cate) => {
        if (cate == '전체보기') {
            setCateState(state)
        } else {
            setCateState(state.filter((d) => {
                return d.category == cate
            }))
        }
    }

    const getLocation = async () => {
        // 수 많은 로직 중에 에러가 발생하면
        // 해당 에러를 포착하여 로직을 멈추고, 에러를 해결하기 위한 catch 영역 로직이 실행
        try {
            await Location.requestForegroundPermissionsAsync();
            const locationData = await Location.getCurrentPositionAsync();
            console.log(locationData);
        } catch (error) {
            // 혹시나 위치를 못가져올 경우를 대비해서, 안내를 준비한다.
            Alert.alert('위치를 찾을 수가 없습니다', '앱을 껐다 켜볼까요?');
        }
    }

    // 날씨
    let todayWeather = 10 + 17;
    let todayCondition = '흐림';


    return ready ? <Loading /> : (
        <SafeAreaView>
        <ScrollView style={styles.container}>
        <StatusBar style="black" />
            {/* 타이틀 */}
            {/* <Text style={styles.title}>나만의 꿀팁</Text> */}
            <Text style={styles.weather}>오늘의 날씨: {todayWeather + '°C ' + todayCondition}</Text>
            <TouchableOpacity></TouchableOpacity>
            {/* 메인 이미지 */}
            <Image source={{ uri: mainImg }} style={styles.mainImage} />
            {/* 탭 버튼 목록 */}
            <ScrollView
                horizontal
                style={styles.btnContainer}
                indicatorStyle={"white"}
            >
                <TouchableOpacity style={styles.btnAll} onPress={()=>{category('전체보기')}}>
                    <Text style={styles.textStyle}>전체보기</Text>
                </TouchableOpacity>
                <TouchableOpacity style={styles.btn01} onPress={()=>{category('생활')}}>
                    <Text style={styles.textStyle}>생활</Text>
                </TouchableOpacity>
                <TouchableOpacity style={styles.btn02} onPress={()=>{category('재테크')}}>
                    <Text style={styles.textStyle}>재테크</Text>
                </TouchableOpacity>
                <TouchableOpacity style={styles.btn03} onPress={()=>{category('반려견')}}>
                    <Text style={styles.textStyle}>반려견</Text>
                </TouchableOpacity>
                <TouchableOpacity style={styles.btn04} onPress={()=>{navigation.navigate('LikePage')}}>
                    <Text style={styles.textStyle}>꿀팁 찜</Text>
                </TouchableOpacity>
            </ScrollView>
            {/* 카드 목록 */}
            {/* 카드 컴포넌트 눌렀을 때 페이지가 이동될 수 있도록 navigation 을 넘겨준다.*/}
            {cateState.map((content, i) => {
                return <Card content={content} key={i} navigation={navigation} />;
            })}
        </ScrollView>
    </SafeAreaView>
    )
}

const styles = StyleSheet.create({
    container: {
        backgroundColor: "#fff",
    },
    title: {
        fontSize: 25,
        marginTop: 20,
        marginLeft: 20,
        fontWeight: "bold",
    },
    weather: {
        alignSelf: 'flex-end',
        paddingRight: 20,
    },
    mainImage: {
        width: "90%",
        height: 200,
        borderRadius: 5,
        alignSelf: "center",
        margin: 10,
    },
    btnContainer: {
        margin: 20,
        height: 60,
    },
    btnAll: {
        backgroundColor: "#20b2aa",
        width: 100,
        borderRadius: 5,
        justifyContent: "center",
        alignItems: "center",
        marginRight: 10,
    },
    btn01: {
        backgroundColor: "rgb(246, 204, 113)",
        width: 100,
        borderRadius: 5,
        justifyContent: "center",
        alignItems: "center",
        marginRight: 10,
    },
    btn02: {
        backgroundColor: "rgb(241, 156, 131)",
        width: 100,
        borderRadius: 5,
        justifyContent: "center",
        alignItems: "center",
        marginRight: 10,
    },
    btn03: {
        backgroundColor: "rgb(178, 223, 208)",
        width: 100,
        borderRadius: 5,
        justifyContent: "center",
        alignItems: "center",
        marginRight: 10,
    },
    btn04: {
        backgroundColor: "rgb(238, 150, 180)",
        width: 100,
        borderRadius: 5,
        justifyContent: "center",
        alignItems: "center",
        marginRight: 10,
    },
    textStyle: {
        color: "#fff",
    },
});
이렇게 하면 위치 정보 접근 허용 팝업이 뜨게 된다.

try/catch문
외부 API 요청 작업을 할 때는 에러 처리 방지 를 위해 주로 try/catch 문으로 감싼다.
API 호출을 제대로 했지만 서버 측에서 또는 휴대폰 자체에서 등 앱 외적으로 오류가 발생할 수 있다.
이런 상황들을 처리하는 코드이다.
try {
  await Location.requestPermissionsAsync();
  const locationData= await Location.getCurrentPositionAsync();
        console.log(locationData)
} catch (error) {
  //혹시나 위치를 못가져올 경우를 대비해서, 안내를 준비합니다
  Alert.alert("위치를 찾을 수가 없습니다.", "앱을 껐다 켜볼까요?");
}
async/await
단순히 외부 API 호출 및 휴대폰 기기에 대한 정보/파일 등에 접근할 때 사용하는 키워드라고 생각하면 쉽다.
이걸 이 때 쓰는 이유는 함수의 실행순서를 고정하기 위해서이다.
외부 네트워크 작업(API 호출)이나 휴대폰의 파일 시스템 또는 위치정보 가져오기 같이 무거운 작업을 하는 경우 어떤 작업부터 할지 알 수 가 없다. (자바스크립트의 "비동기" 특징 때문에)
const func = async function(){
  await func01()
  await func02()
}
const func = async () => {
await func01()
await func02()
}async function func(){
await func01()
await func02()
}

console.log() 로 찍어본 locationData 에는 다음과 같이 위치 좌표(위도, 경도)가 들어있다.
그럼 다음과 같이 데이터에 접근할 수 있다.
console.log(locationData['coords']['latitude'])
console.log(locationData['coords']['longitude'])
Axios
이제 우리가 서버가 제공하는 도메인 형식의 API를 사용하려면 API를 사용하기 위한 도구가 필요하다.
이를 axios 라고 부른다.
설치
yarn add axios위도 경도만 주소에 넣어주면 날씨 데이터를 건네주는 API를 준비
import axios from "axios"
...
const getLocation = async () => {
//수많은 로직중에 에러가 발생하면
//해당 에러를 포착하여 로직을 멈추고,에러를 해결하기 위한 catch 영역 로직이 실행
try {
  //자바스크립트 함수의 실행순서를 고정하기 위해 쓰는 async,await
  await Location.requestForegroundPermissionsAsync();
  const locationData= await Location.getCurrentPositionAsync();
  console.log(locationData)
  console.log(locationData['coords']['latitude'])
  console.log(locationData['coords']['longitude'])
  const latitude = locationData['coords']['latitude']
  const longitude = locationData['coords']['longitude']
  const API_KEY = "cfc258c75e1da2149c33daffd07a911d";
  const result = await axios.get(
    `http://api.openweathermap.org/data/2.5/weather?lat=${latitude}&lon=${longitude}&appid=${API_KEY}&units=metric`
  );

  console.log(result)

} catch (error) {
  //혹시나 위치를 못가져올 경우를 대비해서, 안내를 준비합니다
  Alert.alert("위치를 찾을 수가 없습니다.", "앱을 껏다 켜볼까요?");
}
}
이렇게 axios 로 위도, 경도 값과 API를 이용하기 위한 KEY 값을 넣어주고 요청을 하면 result 에는 해당 위치의 수많은 날씨 데이터가 담겨오게 된다.
그 중 필요한 데이터만 뽑아와보자. 필요한 데이터는 공식 문서를 참고해서 원하는 데이터를 골라서 오면 된다.
const temp = result.data.main.temp;
const condition = result.data.weather[0].main
날씨 데이터 상태관리
이제 이 데이터를 가지고 MainPage.js 에서 표시해보자.
이 때 데이터 변경 시점에 따라 화면을 다시 그려주어야 하므로 날씨 데이터 상태 관리를 해주어야 한다.
//날씨 데이터 상태관리 상태 생성!
const [weather, setWeather] = useState({
temp : 0,
condition : ''
})
const getLocation = async () => {
//수많은 로직중에 에러가 발생하면
//해당 에러를 포착하여 로직을 멈추고,에러를 해결하기 위한 catch 영역 로직이 실행
try {
//자바스크립트 함수의 실행순서를 고정하기 위해 쓰는 async,await
await Location.requestForegroundPermissionsAsync();
const locationData= await Location.getCurrentPositionAsync();
console.log(locationData)
console.log(locationData['coords']['latitude'])
console.log(locationData['coords']['longitude'])
const latitude = locationData['coords']['latitude']
const longitude = locationData['coords']['longitude']
const API_KEY = "cfc258c75e1da2149c33daffd07a911d";
const result = await axios.get(
`http://api.openweathermap.org/data/2.5/weather?lat=${latitude}&lon=${longitude}&appid=${API_KEY}&units=metric`
);
console.log(result)
const temp = result.data.main.temp;
const condition = result.data.weather[0].main
console.log(temp)
console.log(condition)
setWeather({
temp,condition
})
} catch (error) {
//혹시나 위치를 못가져올 경우를 대비해서, 안내를 준비합니다
Alert.alert("위치를 찾을 수가 없습니다.", "앱을 껐다 켜볼까요?");
}
}MainPage.js 최종 코드
import React, {useState, useEffect} from "react";
import {
    StyleSheet,
    Text,
    View,
    Image,
    TouchableOpacity,
    ScrollView,
    SafeAreaView,
    Alert,
} from "react-native";
import { StatusBar } from "expo-status-bar";
import * as Location from 'expo-location';
import data from "../data.json";
import Card from "../components/Card";
import Loading from "../components/Loading";

const mainImg =
    "https://storage.googleapis.com/sparta-image.appspot.com/lecture/main.png";
const cardImg =
    "https://firebasestorage.googleapis.com/v0/b/sparta-image.appspot.com/o/lecture%2Fpizza.png?alt=media&token=1a099927-d818-45d4-b48a-7906fd0d2ad3";

// 페이지 이동을 구현
// Stack.Screen 으로부터 MainPage 는 navigation과 route 를 인자로 전달받는다.
export default function MainPage({navigation, route}) {
    const [state, setState] = useState([]);
    const [ready, setReady] = useState(true);
    const [cateState, setCateState] = useState([]);
    const [weather, setWeather] = useState({
        temp: 0,
        cnodition: '',
    })

    useEffect(() => {
        // 헤더의 타이틀 변경
        navigation.setOptions({
            title: '나만의 꿀팁'
        })

        setTimeout(()=>{
            getLocation()
            setState(data.tip)
            setCateState(data.tip)
            setReady(false)
        }, 1000)
    }, [])

    const category = (cate) => {
        if (cate == '전체보기') {
            setCateState(state)
        } else {
            setCateState(state.filter((d) => {
                return d.category == cate
            }))
        }
    }

    const getLocation = async () => {
        // 수 많은 로직 중에 에러가 발생하면
        // 해당 에러를 포착하여 로직을 멈추고, 에러를 해결하기 위한 catch 영역 로직이 실행
        try {
            await Location.requestForegroundPermissionsAsync();
            const locationData = await Location.getCurrentPositionAsync();
            const latitude = locationData['coords']['latitude']
            const longitude = locationData['coords']['longitude']
            const API_KEY = 'cfc258c75e1da2149c33daffd07a911d';
            const result = await axios.get(
                `http://api.openweathermap.org/data/2.5/weather?lat=${latitude}&lon=${longitude}&appid=${API_KEY}&units=metric`
            );
            console.log(result);

            const temp = result.data.main.temp;
            const condition = result.data.weather[0].main

            console.log(temp)
            console.log(condition)

            setWeather({
                temp,
                condition,
            })

        } catch (error) {
            // 혹시나 위치를 못가져올 경우를 대비해서, 안내를 준비한다.
            Alert.alert('위치를 찾을 수가 없습니다', '앱을 껐다 켜볼까요?');
        }
    }

    return ready ? <Loading /> : (
        <SafeAreaView>
        <ScrollView style={styles.container}>
        <StatusBar style="black" />
            {/* 타이틀 */}
            {/* <Text style={styles.title}>나만의 꿀팁</Text> */}
            <Text style={styles.weather}>오늘의 날씨: {weather.temp + '°C ' + weather.condition}</Text>
            <TouchableOpacity></TouchableOpacity>
            {/* 메인 이미지 */}
            <Image source={{ uri: mainImg }} style={styles.mainImage} />
            {/* 탭 버튼 목록 */}
            <ScrollView
                horizontal
                style={styles.btnContainer}
                indicatorStyle={"white"}
            >
                <TouchableOpacity style={styles.btnAll} onPress={()=>{category('전체보기')}}>
                    <Text style={styles.textStyle}>전체보기</Text>
                </TouchableOpacity>
                <TouchableOpacity style={styles.btn01} onPress={()=>{category('생활')}}>
                    <Text style={styles.textStyle}>생활</Text>
                </TouchableOpacity>
                <TouchableOpacity style={styles.btn02} onPress={()=>{category('재테크')}}>
                    <Text style={styles.textStyle}>재테크</Text>
                </TouchableOpacity>
                <TouchableOpacity style={styles.btn03} onPress={()=>{category('반려견')}}>
                    <Text style={styles.textStyle}>반려견</Text>
                </TouchableOpacity>
                <TouchableOpacity style={styles.btn04} onPress={()=>{navigation.navigate('LikePage')}}>
                    <Text style={styles.textStyle}>꿀팁 찜</Text>
                </TouchableOpacity>
            </ScrollView>
            {/* 카드 목록 */}
            {/* 카드 컴포넌트 눌렀을 때 페이지가 이동될 수 있도록 navigation 을 넘겨준다.*/}
            {cateState.map((content, i) => {
                return <Card content={content} key={i} navigation={navigation} />;
            })}
        </ScrollView>
    </SafeAreaView>
    )
}

const styles = StyleSheet.create({
    container: {
        backgroundColor: "#fff",
    },
    title: {
        fontSize: 25,
        marginTop: 20,
        marginLeft: 20,
        fontWeight: "bold",
    },
    weather: {
        alignSelf: 'flex-end',
        paddingRight: 20,
    },
    mainImage: {
        width: "90%",
        height: 200,
        borderRadius: 5,
        alignSelf: "center",
        margin: 10,
    },
    btnContainer: {
        margin: 20,
        height: 60,
    },
    btnAll: {
        backgroundColor: "#20b2aa",
        width: 100,
        borderRadius: 5,
        justifyContent: "center",
        alignItems: "center",
        marginRight: 10,
    },
    btn01: {
        backgroundColor: "rgb(246, 204, 113)",
        width: 100,
        borderRadius: 5,
        justifyContent: "center",
        alignItems: "center",
        marginRight: 10,
    },
    btn02: {
        backgroundColor: "rgb(241, 156, 131)",
        width: 100,
        borderRadius: 5,
        justifyContent: "center",
        alignItems: "center",
        marginRight: 10,
    },
    btn03: {
        backgroundColor: "rgb(178, 223, 208)",
        width: 100,
        borderRadius: 5,
        justifyContent: "center",
        alignItems: "center",
        marginRight: 10,
    },
    btn04: {
        backgroundColor: "rgb(238, 150, 180)",
        width: 100,
        borderRadius: 5,
        justifyContent: "center",
        alignItems: "center",
        marginRight: 10,
    },
    textStyle: {
        color: "#fff",
    },
});
👉 적용된 모습

서버 리스
서버리스란 서버를 직접 만들 필요가 없다는 정도의 의미로 이해하면 될 것 같다.
현재 나만의 꿀팁 앱에서 필요한 서버 기능
- 꿀팁 데이터를 서버로부터 가져오기: 앱 내에 데이터로써 존재한다면, 꿀팁을 업데이트 하고 싶을 때 항상 마켓에 재배포 해야하고, 사용자들은 항상 다시 다운로드 받아야 한다. 때문에 서버에 데이터를 저장해두고, API 형태로 불러와서 사용하면 실시간 업데이트 현황이 앱에 반영 될 것이다.
- 꿀팁 찜한 데이터 관리: 로그인/로그아웃 기능을 구현한 뒤, 유저별로 찜한 데이터가 어딘가에 저장되어 있어야 어디서든 관리하고 보여줄 수 있다.
파이어베이스
파이어베이스는 구글에서 만든 서버리스 서비스이다.

한 서비스를 만드는데 충분한 많은 서버적 기능들을 제공해준다.
우린 이번에 여기서 데이터베이스, 이미지 파일 서버를 사용할 예정이다.
파이어베이스 프로젝트 내에서 앱 생성하기
프로젝트가 생성되었으면 파이어베이스에 iOS/안드로이드/웹 어느 것을 개발하고 있는지 알려줘야 개발중인 앱에 파이어베이스를 코드단에서 연결할 수 있는 연결 정보를 준다.
우리는 안드로이드, iOS 앱 전용 개발을 Expo에서 따로 하고 있지 않고 자바스크립트로만 개발을 하고 있기 때문에 웹 SDK를 이용하면 쉽게 파이어 베이스 사용이 가능하다.


이렇게 하면 파이어베이스 프로젝트 내에서 앱을 생성하면, 최종적으로 연결 정보를 준다.


앱에 파이어베이스 도구 설치 및 연결
파이어베이스를 이용할 수 있게 도와주는 expo 도구를 설치한다.
설치
expo install firebase설치가 완료되면, firebaseConfig.js 파일을 하나 생성해서 다음 코드를 입력해주자.
import firebase from "firebase/compat/app";

// 사용할 파이어베이스 서비스 주석을 해제합니다
//import "firebase/compat/auth";
import "firebase/compat/database";
//import "firebase/compat/firestore";
//import "firebase/compat/functions";
import "firebase/compat/storage";

// Initialize Firebase
//파이어베이스 사이트에서 봤던 연결정보를 여기에 가져옵니다
const firebaseConfig = {
  apiKey: "AIzaSyBKG2xY91x23W8PF1231k5OUJ5o9kHSKYQeNWUw",
  authDomain: "sparta-psytest-gun.firebaseapp.com",
  databaseURL: "https://sparta-psytest-gun.firebaseio.com",
	//위 databaseURL은 firebase에서 기본제공 해주지 않으니 직접 작성해주세요!
  projectId: "sparta-psytest-gun",
  storageBucket: "sparta-psytest-gun.appspot.com",
  messagingSenderId: "781790378482",
  appId: "1:78179037128482:web:ddbca5330779f67b947136b",
  measurementId: "G-3F5L9F3340Q3"
};

//사용 방법입니다.
//파이어베이스 연결에 혹시 오류가 있을 경우를 대비한 코드로 알아두면 됩니다.
if (!firebase.apps.length) {
    firebase.initializeApp(firebaseConfig);
}

export const firebase_db = firebase.database()
🚨 접속 정보엔 개인별로 생성된 접속 정보 코드를 넣어야 한다.
최근 파이어베이스에서 프로젝트를 만들면 원래는 설정코드에 넣어줬던 databaseUrl을 안넣어주고 있다..!
따라서 다음과 같이 리얼타임 데이터베이스 탭으로 들어간 다음, Realtime Database 를 생성한 뒤, 데이터 베이스 주소를 설정 코드에 넣어주어야 한다!!

const firebaseConfig = {
  apiKey: "AIzaSyBKG2xY91x23W8PF1231k5OUJ5o9kHSKYQeNWUw",
  authDomain: "sparta-psytest-gun.firebaseapp.com",
  databaseURL: "개인주소",
  projectId: "sparta-psytest-gun",
  storageBucket: "sparta-psytest-gun.appspot.com",
  messagingSenderId: "781790378482",
  appId: "1:78179037128482:web:ddbca5330779f67b947136b",
  measurementId: "G-3F5L9F3340Q3"
};
파일 스토리지
저장소에 이미지 및 사용할 파일을 올려두고, 필요할 때 마다 꺼내 쓰는 용도로 사용하면 된다.
파일 저장소 생성
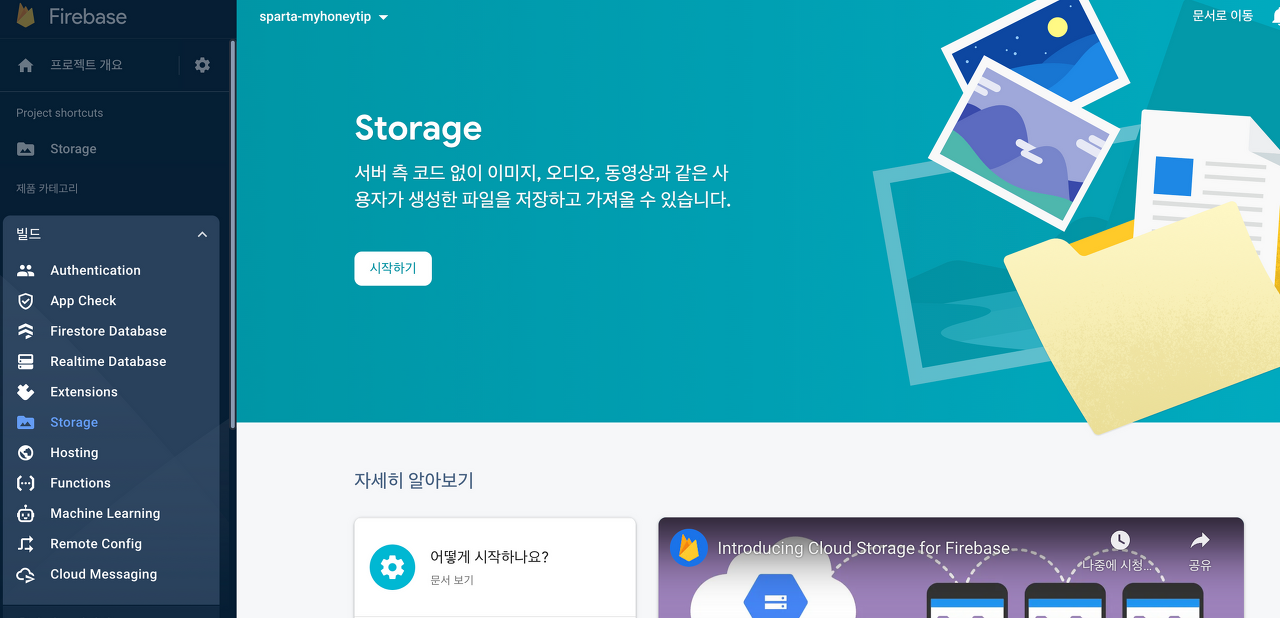


이미지 올리기


리얼타임 데이터베이스
JSON 형태로 저장/관리되는 데이터 베이스 서비스이다.
이 서비스를 사용할 땐, 파이어베이스에서 제공해주는 함수들을 이용하기만 하면 데이터 저장/수정/삭제가 가능하다.
설정
리얼타임 데이터베이스 생성


규칙으로 들어와 read, write 을 모두 true 로 바꿔준다.
수정이 완료되면 게시를 누른다.

데이터 업로드
지금까지는 '꿀팁' 데이터를 data.json 파일로 관리하고 사용하고 있었다.
이제 이 데이터를 서버에 올려 관리하고자 한다.


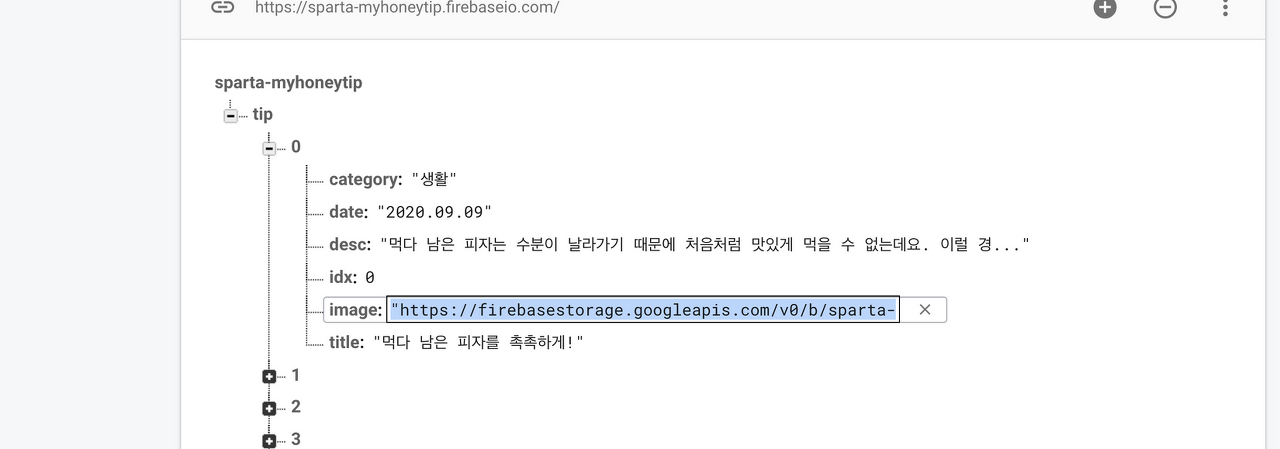
이렇게 우리가 가진 팁들이 딕셔너리 구조로 저장이 되며, 0,1,2,3,4... 리스트의 형태로 차곡차곡 쌓여있는 모습을 볼 수 있다.
전체 데이터 읽기
파이어베이스를 이용해 전체 데이터를 조회 하는 방법은 아래 두가지를 알아야 한다.
- 전체 데이터를 가져오게끔 해주는 파이어베이스 제공 함수 사용 방법
- 가져올 데이터가 어떠한 이름으로 리얼타임 데이터베이스에 저장되어 있는지
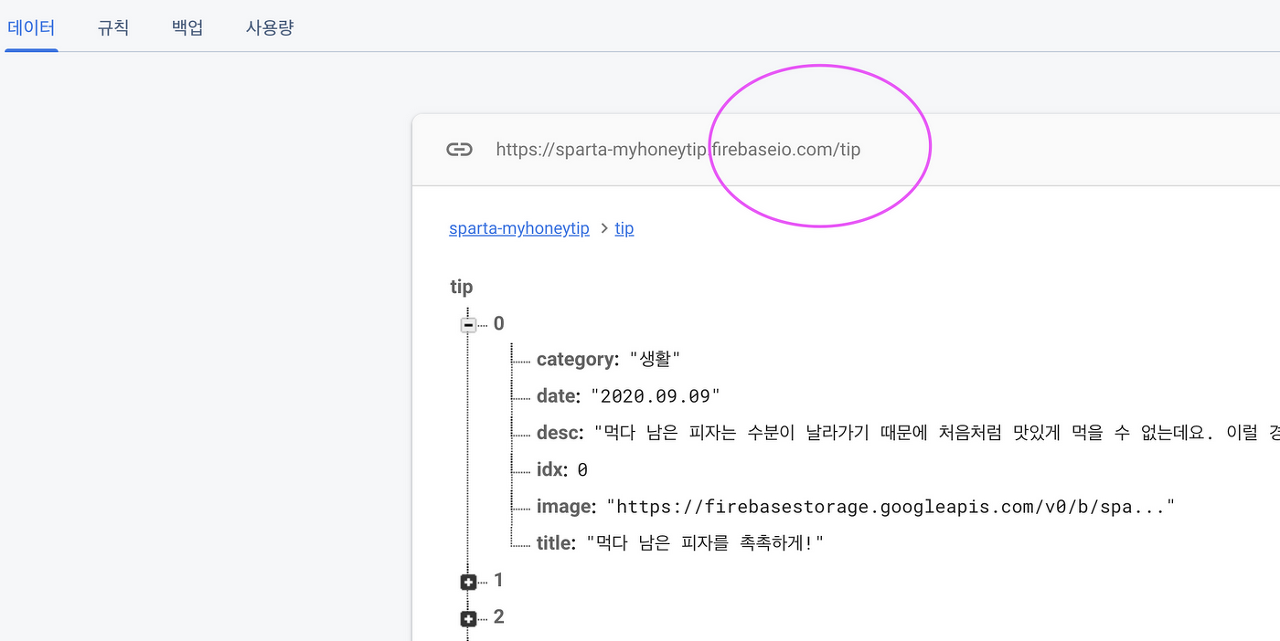
리얼타임 데이터베이스를 생성하면 고유한 DB 주소를 갖게 된다.
강의의 경우 https://sparta-myhoenytip.firebaseio.com/ 이와 같은 주소에 리얼타임 데이터 베이스가 생성되었다.
이 고유 주소에 tip 이란 방에 꿀팁 데이터들이 저장되어있다.

전체 데이터 가져오기 함수
데이터의 저장 위치를 알았다면, 파이어베이스의 리얼타임 데이터베이스 전용 함수에 데이터 저장 위치를 알려주면서 데이터를 가져올 수 있다.
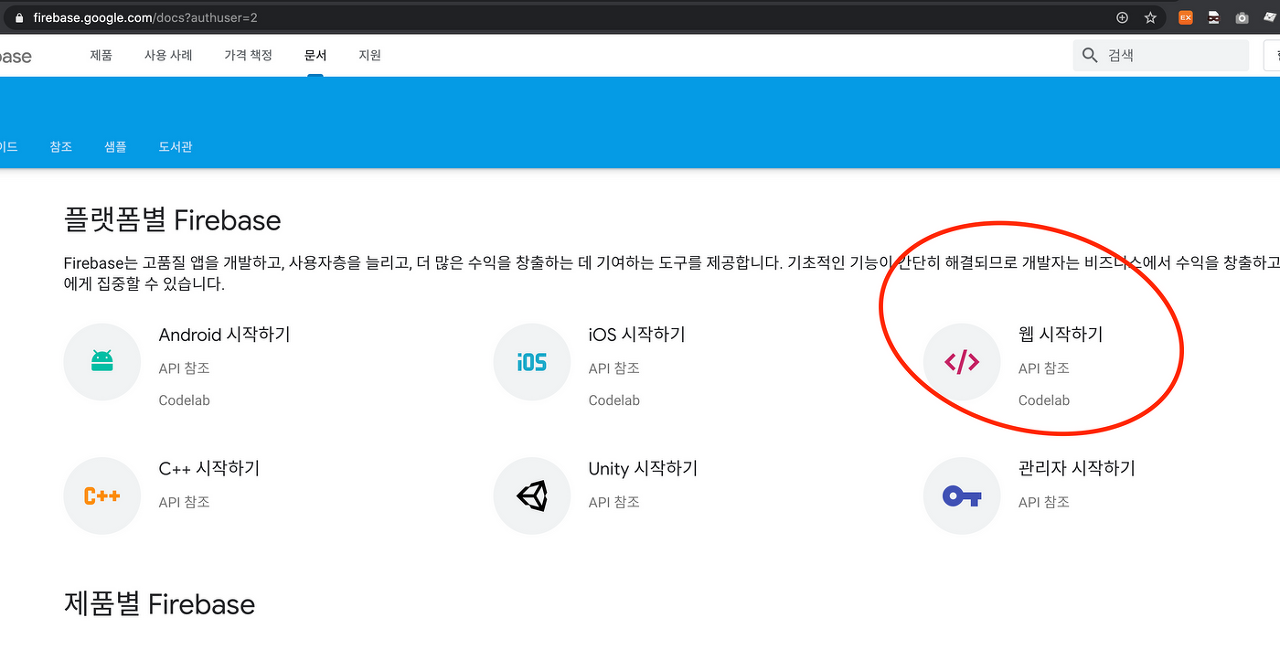
*파이어베이스 API 함수는 문서로 이동 > 웹 시작하기 문서에서 확인할 수 있다.
firebase_db.ref('/tip').once('value').then((snapshot) => {
   let tip = snapshot.val();
})
ref('/tip') 이 부분에서 /tip 영역에 가지고 오고싶은 데이터의 주소를 넣어주면 된다.
이 주소 앞부분에는 https://sparta-myhoneytip.firebaseio.com/ 과 같은 주소가 생략되어 있다.
⭐ firebaseConfig.js 에서 이미 파이어베이스 계정을 세팅했기 때문에, 기본 주소와 정보들은 앱 내에서 사용하는 파이어베이스 함수들이 알고 있는 상태이다.
firebase_db.ref('/tip').once('value').then((snapshot) => {})이 코드는 서버리스를 이용하여 데이터베이스를 조회하기 위해 파이어베이스 측에서 정해놓은 API 사용방법이다.
따라서 우리는 공식 문서 그대로 사용 방법을 적용해야 한다.
조회한 데이터는 snapshot 부분에 담겨서 { } 내부에서 사용할 수 있는데, 그 중 실제 우리에게 필요한 데이터는 snapshot.val() 로 가져와 변수에 담아 사용할 수 있다.
적용
// MainPage.js
...
import {firebase_db} from "../firebaseConfig"

export default function MainPage({navigation,route}) {
 ...
  useEffect(()=>{
    navigation.setOptions({
      title:'나만의 꿀팁'
    })

    setTimeout(()=>{
        firebase_db.ref('/tip').once('value').then((snapshot) => {
          console.log("파이어베이스에서 데이터 가져왔습니다!!")
          let tip = snapshot.val();

          setState(tip)
          setCateState(tip)
          getLocation()
          setReady(false)
        });
        // getLocation()
        // setState(data.tip)
        // setCateState(data.tip)
        // setReady(false)
    },1000)
  },[])

...
data.json 과 구조가 동일한 데이터를 리얼타임 데이터베이스에 업로드 했고, 그대로 가져와 사용하고 있으므로 기존에 관리하던 상태에 파이어베이스 데이터를 넣으면 앱이 정상적으로 동작한다.
🚨 한 가지 달라진 점은 useEffect에서 setTimeout 함수를 더이상 사용하지 않는다는 것이다.
useEffect(()=>{
  //헤더의 타이틀 변경
    navigation.setOptions({
        title:'나만의 꿀팁'
    })
    firebase_db.ref('/tip').once('value').then((snapshot) => {
      console.log("파이어베이스에서 데이터 가져왔습니다!!")
      let tip = snapshot.val();
      setState(tip)
      setCateState(tip)
      getLocation()
      setReady(false)
    });
},[])
사용자들마다 네트워크 상태가 모두 다를 것이기 때문에, 무조건 몇 초뒤에 실행시키는 setTimeout 함수 보다는 파이어베이스 API의 실행 완료 시간에 맡겨두는 것이 더 낫기 때문에 setTimeout 을 사용하지 않는다.
따라서 setTimeout 으로 임의로 데이터가 준비될 시간을 주는 것이 아니라 파이어베이스, 서버로부터 데이터를 가져와 준비할 때 까지 로딩화면을 보여줬다가 데이터가 준비되면 화면을 보여주는 서비스 환경을 사용자들에게 제공해줄 수 있다.

특정 데이터 읽기
현재 나의 꿀팁앱의 구현 과정은 이렇다.
메인 화면에서 꿀팁(Card)을 누르면 상세 화면(DetailPage)로 이동한다.
누를 때 마다 누른 꿀팁에 대한 상세 데이터를 볼 수 있는 이유는 꿀팁 컨텐츠 전체(content)를 상세 페이지로 넘겨주고 있기 때문에 상세 페이지에서 자세한 데이터를 볼 수 있다.
//MainPage로 부터 navigation 속성을 전달받아 Card 컴포넌트 안에서 사용
export default function Card({content,navigation}){
return(
//카드 자체가 버튼역할로써 누르게되면 상세페이지로 넘어가게끔 TouchableOpacity를 사용
<TouchableOpacity style={styles.card} onPress={()=>{navigation.navigate('DetailPage',content)}}>
<Image style={styles.cardImage} source={{uri:content.image}}/>
<View style={styles.cardText}>
<Text style={styles.cardTitle} numberOfLines={1}>{content.title}</Text>
<Text style={styles.cardDesc} numberOfLines={3}>{content.desc}</Text>
<Text style={styles.cardDate}>{content.date}</Text>
</View>
</TouchableOpacity>
)
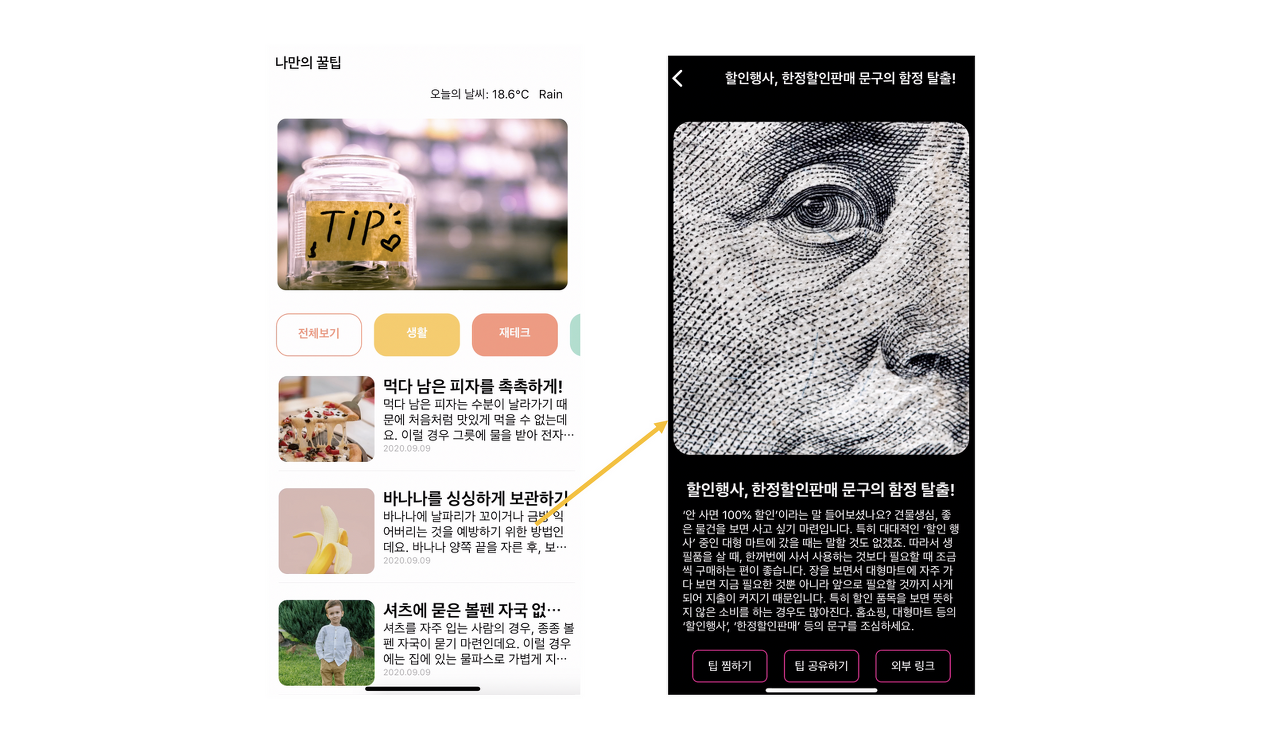
}이 부분을 이제 전체 데이터를 상세 페이지로 넘겨주는 것이 아닌, 팁의 idx 번호만 넘겨준 다음 DetailPage.js 에서 idx 로 상세 꿀팁 정보를 서버로 부터 조회해서 뿌려보자.
디테일 화면의 데이터엔 보통
- 자세한 내용에 대한 데이터
- 댓글 정도의 데이터가 담겨 있는데, 이 데이터들도 실시간으로 변경될 수 있다.
따라서 그때그때 변경된 데이터가 항상 반영되는(반영해야되는) 파이어베이스 데이터베이스로부터 가져와야 한다.
이러한 전체 데이터(큰 데이터)들이 이동하는 것은 앱 퍼포먼스 저하의 원인이 된다!
따라서 idx 번호만 넘겨서 필요한 데이터는 서버로부터 그때그때 오도록 구현을 해보자.
Card.js 에서 DetailPage.js 전달 데이터로 idx 넘겨주기
// Card.js
import React from "react";
import { View, Text, Image, StyleSheet, TouchableOpacity } from "react-native";

// MainPage 로 부터 navigation 을 전달 받았다.
export default function Card({ content, navigation }) {
    const { image, title, desc, date } = content;
    return (
        // 카드 자체가 버튼 역할로써 누르게 되면 상세페이지로 넘어가게끔 View→TouchableOpacity 를 사용
        // 카드를 눌렀을 때 페이지가 이동되도록 navigation 함수 연결
        // 두번째 인자로 넘겨줄 데이터인 content 를 넣어준다.
        <TouchableOpacity style={styles.card} onPress={()=>
        {navigation.navigate('DetailPage', {idx: content.idx})}}>
            <Image style={styles.cardImg} source={{ uri: image }} />
            <View style={styles.textContainer}>
                <Text style={styles.cardTitle}>{title}</Text>
                <Text style={styles.cardDesc} numberOfLines={3}>
                    {desc}
                </Text>
                <Text style={styles.cardDate}>{date}</Text>
            </View>
        </TouchableOpacity>
    );
}

const styles = StyleSheet.create({
    card: {
        flex: 1,
        flexDirection: "row",
        marginHorizontal: 20,
        paddingVertical: 15,
        borderBottomWidth: 0.5,
        borderBottomColor: "#eee",
    },
    cardImg: {
        flex: 1,
        width: "100%",
        height: "100%",
        borderRadius: 8,
        marginRight: 10,
    },
    textContainer: {
        flex: 2,
        flexDirection: "column",
        height: "100%",
    },
    cardTitle: {
        fontSize: 22,
        fontWeight: "bold",
    },
    cardDesc: {
        fontSize: 18,
    },
    cardDate: {
        fontSize: 16,
        color: "gray",
    },
});
DetailPage.js 에서 넘겨받은 idx 팁 상세 데이터 조회
import React, { useEffect, useState } from "react";
import {
    StyleSheet,
    Text,
    View,
    Image,
    TouchableOpacity,
    SafeAreaView,
    ScrollView,
    Alert,
    Share
} from "react-native";
import * as Linking from 'expo-linking';
import {firebase_db} from "../firebaseConfig"

export default function DetailPage({navigation, route}) {
    // 기존에 DetailPage 에 고정된 데이터는 useState의 기본값으로 넣어주었다.
    // 이는 화면에 그려질 때 tip 에 데이터가 없어서 오류가 뜨는 것을 방지할 수 있다!
    const [tip, setTip] = useState({
        'idx': 9,
        'category': "재테크",
        'title': "렌탈 서비스 금액 비교해보기",
        'image': "https://storage.googleapis.com/sparta-image.appspot.com/lecture/money1.png",
        'desc': "요즘은 정수기, 공기 청정기, 자동차나 장난감 등 다양한 대여서비스가 활발합니다. 사는 것보다 경제적이라고 생각해 렌탈 서비스를 이용하는 분들이 늘어나고 있는데요. 다만, 이런 렌탈 서비스 이용이 하나둘 늘어나다 보면 그 금액은 겉잡을 수 없이 불어나게 됩니다. 특히, 렌탈 서비스는 빌려주는 물건의 관리비용까지 포함된 것이기에 생각만큼 저렴하지 않습니다. 직접 관리하며 사용할 수 있는 물건이 있는지 살펴보고, 렌탈 서비스 항목에서 제외해보세요. 렌탈 비용과 구매 비용, 관리 비용을 여러모로 비교해보고 고민해보는 것이 좋습니다. ",
        'date': "2020.09.09",
    });
    const { title, image, desc } = tip;

    useEffect(()=> {
        console.log(route)
        // Card.js 에서 navigation.navigate 함수를 쓸 때 두번째 인자로 content 를 넘겨주었다.
        // content 는 딕셔너리 자체였으므로 route.params에 고대로 들어온다.
        // 즉, route.params 는 content 이다.

        navigation.setOptions({
            title: route.params.title,
            // StackNavigator 에서 작성했던 옵션을 다시 수정할 수도 있다.
            headerStyle: {
                backgroundColor: '#000',
                shadowColor: '#000',
            },
            headerTintColor: '#fff',
        })
        // 넘어온 데이터는 route.params에 들어 있다.
        const { idx } = route.params;
        firebase_db.ref('/tip/'+idx).once('value').then(snapshot => {
            let tip = snapshot.val();
            setTip(tip);
        })
    }, [])

    const popup = () => {
        Alert.alert('팝업!!')
    };

    const share = () => {
        Share.share({
            message: `${title} \n\n ${desc} \n\n ${image}`,
        });
    }

    const link = () => {
        Linking.openURL('https://spartacodingclub.kr')
    }

    return (
        <SafeAreaView style={styles.container}>
            <ScrollView>
                <Image
                    style={styles.img}
                    source={{
                        uri: image,
                    }}
                />
                <View style={styles.textContainer}>
                    <Text style={styles.title}>{title}</Text>
                    <Text style={styles.desc}>{desc}</Text>
                    <View style={styles.btnGroup}>
                        <TouchableOpacity style={styles.button} onPress={()=>{popup()}}>
                            <Text style={styles.textStyle}>팁 찜하기</Text>
                        </TouchableOpacity>
                        <TouchableOpacity style={styles.button} onPress={()=>{share()}}>
                            <Text style={styles.textStyle}>공유하기</Text>
                        </TouchableOpacity>
                        <TouchableOpacity style={styles.button} onPress={()=>{link()}}>
                            <Text style={styles.textStyle}>외부 링크</Text>
                        </TouchableOpacity>
                    </View>

                </View>
            </ScrollView>
        </SafeAreaView>
    );
}

const styles = StyleSheet.create({
    container: {
        flex: 1,
        backgroundColor: "#000",
    },
    img: {
        width: "95%",
        height: "100%",
        alignSelf: "center",
        borderRadius: 20,
        marginTop: 10,
        marginBottom: 30,
    },
    textContainer: {
        marginHorizontal: 15,
    },
    title: {
        color: "#fff",
        fontSize: 30,
        fontWeight: "bold",
        textAlign: "center",
        marginBottom: 10,
    },
    desc: {
        fontSize: 20,
        color: "#fff",
        marginBottom: 20,
    },
    btnGroup: {
        flexDirection: 'row',
        justifyContent: 'center',
    },
    button: {
        width: 100,
        height: 50,
        margin: 10,
        borderWidth: 2,
        borderColor: "rgb(153, 37, 101)",
        borderRadius: 8,
        justifyContent: "center",
        alignItems: "center",
        alignSelf: "center",
    },
    textStyle: {
        color: "#fff",
        fontSize: 18,
    },
});
쓰기
나만의 꿀팁 앱에서 파이어베이스로 데이터를 보내서 저장해야 하는 상황은 언제일까?
바로 꿀팁 찜 버튼을 눌렀을 때 이다!
'특정' 사용자가 어떤 꿀팁에 대한 찜 버튼을 눌렀는지 저장을 하고, 실제 찜 페이지에서 어떤 꿀팁인지 나열해주려면 다음과 같은 데이터들을 저장해야 할 것이다.
- 꿀팁 번호: idx
- 꿀팁 이미지: image
- 꿀팁 제목: title
- 꿀팁 내용: desc
👉 거의 전체 데이터이다.
그리고 사용자마다 고유한 정보들을 관리하려면, 사용자 고유 ID 값 데이터가 필요하다. 그래야 구분을 할 수 있으니까!
Expo에서는 앱 사용자들의 고유 아이디를 생성해서 알려준다. 이를 통해 사용자 들마다 고유한 ID값으로 데이터를 관리할 수 있다.
이 코드를 이용하면 앱 어디서든지 동일한 사용자 유니크 아이디를 생성 및 사용할 수 있다. (expo-application 공식문서)
설치
expo install expo-application
적용
import * as Application from 'expo-application';
const isIOS = Platform.OS === 'ios';

let uniqueId;
if(isIOS){
  let iosId = await Application.getIosIdForVendorAsync();
  uniqueId = iosId
}else{
  uniqueId = Application.androidId
}

console.log(uniqueId)
Platform.OS 에서 OS 는 어떤 디바이스 운영체제에서 실행하고 있는지 알아내는 도구이다.
현재는 자바스크립트 문법으로 ios, android 앱을 개발하고 있지만, 안드로이드와 ios 운영체제에 맞게 화면이나 코드를 조건 처리 할 필요가 있다.
expo-application 공식문서를 보면 ios와 안드로이드에서 각각 고유번호를 가져오는 방식이 조금씩 다르다.
때문에 운영체제마다 분기처리를 해주어야 한다.
const isIOS = Platform.OS === 'ios';운영체제가 ios 라면 isIOS 에 true, 아니라면 false 값이 담기게 된다.
if(isIOS){
  let iosId = await Application.getIosIdForVendorAsync();
  uniqueId = iosId
}else{
  uniqueId = Application.androidId
}
async/await 을 통해 순서대로 가져오도록 한다.
isIOS 가 true 라면 ios 용 iosID 를 가져온다. (Application.getIosIdForVendorAsync())
isIOS 가 false 라면 android 용 androidID 를 가져온다. (Application.androidId)
각각 운영체제에 따라 사용자 ID 를 가져와서 uniqueId 변수에 담는다.
저장 구현하기
- 저장하는 시점: DetailPage 의 꿀팁 찜하기 버튼을 눌렀을 때 (onPress)
- 저장해야 하는 데이터: 여러가지가 있지만, DetailPage에서 idx 로 조회한 해당 찜의 전체 데이터를 저장해보자. 해당 데이터는
const [tip, setTip] = useState()에tip상태에 저장되어 관리되고 있다! tip 을 저장하면 될 것 같다.
onPress에 외부 함수 연결하기
// DetailPage.js
import * as Application from 'expo-application';
const isIOS = Platform.OS === 'ios';

...

const like = async () => {
    // 찜 데이터 방 > 사용자 방 > 어떤 찜인지 아이디
    let userUniqueId; // 빈 데이터 생성
    if(isIOS){
    let iosId = await Application.getIosIdForVendorAsync();
        userUniqueId = iosId
    }else{
        userUniqueId = await Application.androidId
    }

    // '/like/'+userUniqueId+'/'+ tip.idx 부분은 데이터가 저장될 경로
    // set 함수의 첫번째 인자로는 저장할 데이터, 두번째 인자는 에러 발생 시 처리할 함수를 둔다.
    console.log(userUniqueId)
        firebase_db.ref('/like/'+userUniqueId+'/'+ tip.idx).set(tip,function(error){
            console.log(error)
            Alert.alert("찜 완료!")
        });
}

...

<TouchableOpacity style={styles.button} onPress={()=>like()}><Text style={styles.buttonText}>팁 찜하기</Text></TouchableOpacity>
'/like/'+userUniqueId+'/'+ tip.idx부분은 데이터가 저장될 경로.set()함수의 첫번째 인자로는 저장할 데이터, 두번째 인자는 에러 발생 시 처리할 함수를 둔다.- .set() 함수는 여러번 팁 찜하기 버튼을 눌러도 동일한 유니크값 id 가 있다면 덮어쓰기가 되도록, 똑같은 데이터라면 그 데이터 하나만 존재하도록 중복을 제거해주는 함수이다. (파이어베이스 공식문서 참고)
구현 확인

